Running a Shopify store is a cart full of business opportunities and challenges. If you are a Shopify store owner, you’d already know how crucial it is to set up a store, place your products correctly and offer fair prices for your products. However, sales are still a tough row to hoe. It becomes overwhelming for most Shopify store owners who opt to do things without the help of Shopify Marketing Experts. When store owners don’t find people actively buying products after all the possible efforts, they often give up on their Shopify goals.
Phew! Sounds like trouble, right? You can fix it by understanding your user behaviour when they visit your store. How would you know it? Analytics can help. Understanding Analytics is the key to unlock success in the ecommerce world. It is important data to map your buyer actions, identify the bottleneck and improve your store experience for better conversions.
If you are looking for a step-by-step guide to effectively use analytics tools such as GA 4 and Shopify Analytics for your Shopify store, you’ve come to the right place. Let’s not delay further and get started with Analytics right away!
Overview Outline
In this guide, we will explain:
1. What is Google Analytics?
Google Analytics is a free web analytics tool by Google. It is one of the best platforms for measuring metrics free of costs. This tool help users track websites, social network blogs, conversions, engagement, and lots more in one place. Every website owner is likely to use the website for some sort of goal. It is where Google Analytics comes into play. It helps digital marketers, businesses to analyse their progress through a systematic data analysis approach. In short, it is a perfect tool to get a deeper understanding of your target customers, existing customers, and business progress, overall!
2. Importance of Google Analytics for Shopify
There is one common reason that brings businesses to Shopify – Immense Growth Opportunity. While your business can have multiple reasons and goals, what matters is the journey to reach your goals. Google Analytics helps ecommerce businesses to achieve their goals in an informed, trackable manner. Through Google Analytics, you can focus on ideal audience targeting based on demographics, psychographics, and buying behaviour for your Shopify store. You can use GA to identify your Customer Acquisition Pattern- which channels are bringing you more business. It could be an organic search, paid ads, social media, direct, referrals, or more. You can check Shopify Add to Cart Analytics. A Shopify store owner with Google Analytics synced can also track why people leave your store without sales. A check on bounce rate helps improve user experience and identify the problem areas on your Shopify store or website. Digital Marketers can also use it for campaign tracking and evaluation. And the list of benefits of using Google Analytics for Shopify goes on!
This is the reason why around 50 million websites use Google Analytics. If you haven’t used it yet, now is the time to set up your website’s Google Account. It’s free; it’s incredible!
Looks complicated already? You can connect to the best Shopify Marketing Experts in India, to professionally market your Shopify Store and boost sales.
3. How to Set Up a Google Analytics Account?
(This stepwise guide is for those who are new to Google Analytics. If you are a pro, you can skip this step).
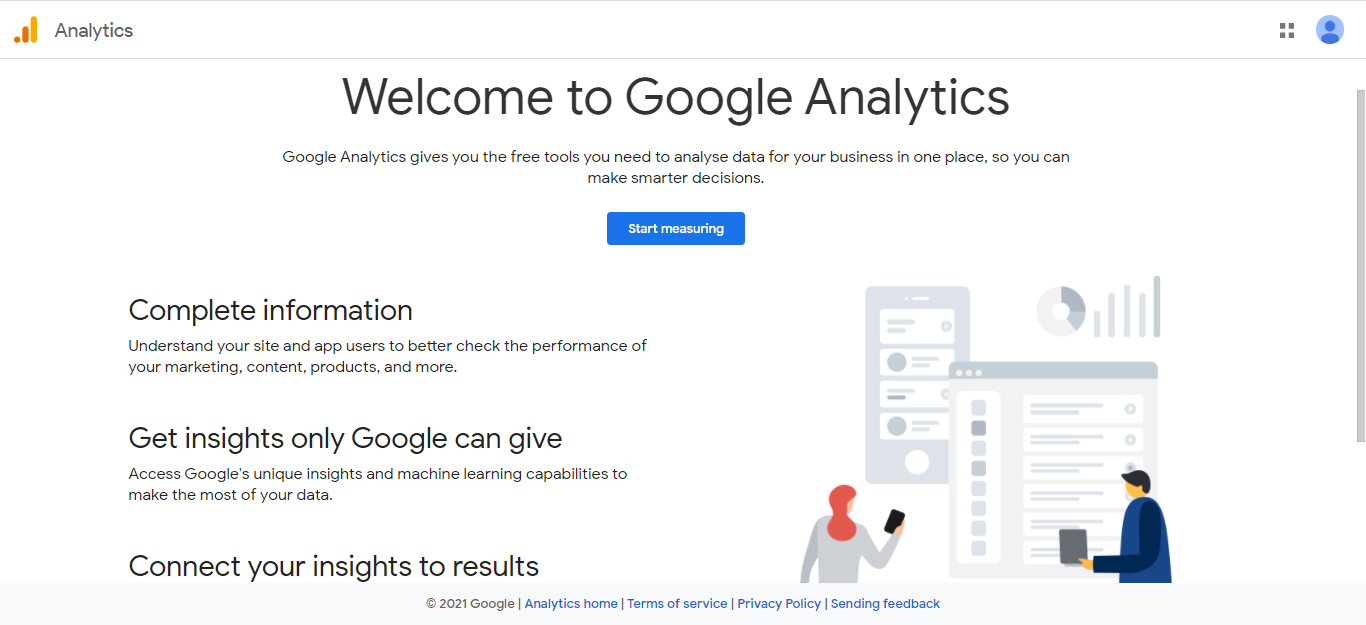
STEP 1: First thing first, you need a Google Analytics Account to use this free tool by Google. To create an account, visit https://analytics.google.com. You can use your existing Gmail existing account to sign in or create a new account. Your screen should look like this:
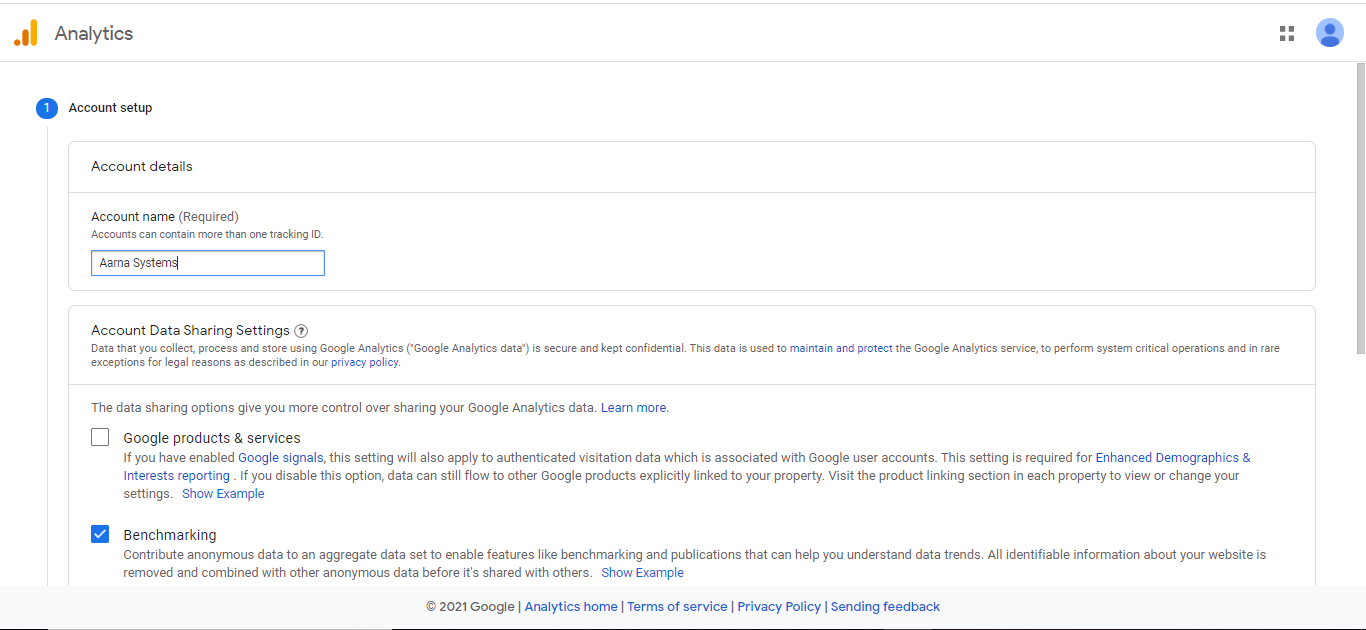
STEP 2: Start creating your account. You will see the Account Setup Form. Fill in your Account Name, Account Data Sharing Details, and more.
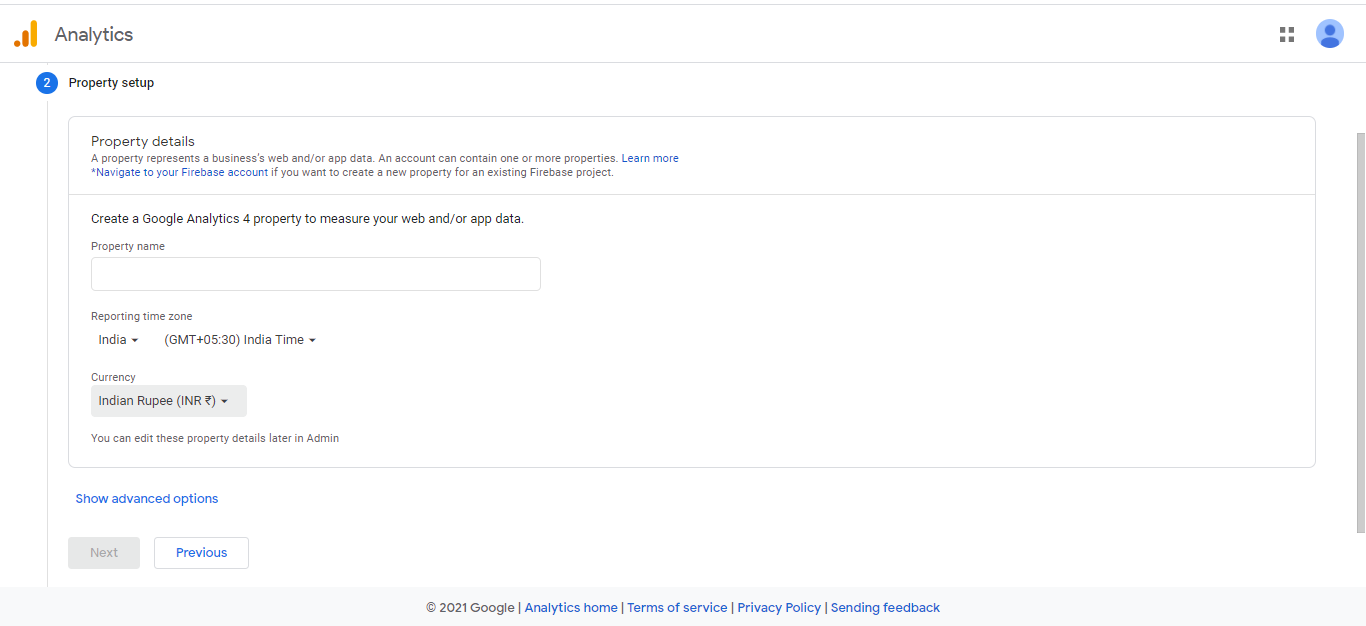
STEP 3: Now, Google Analytics gives you the option to add four properties to your account and measure the web/app data. You can create a property as per your requirement.
For Eg: If you have four businesses in multiple locations and have different websites/apps, you can create a property for all four businesses in a single account. Make sure you set the time zone and currency correctly for each property.
STEP 4: Once your property is set, now you need to set up a data stream to start collecting data from your chosen platforms. Google Analytics gives three options for collecting data: Web, Android app, iOS app. Choose your preferred platform (For the Shopify store, you choose Web). After creating a data stream, you will get tagging information and Measurement ID and global site tag for the web stream. You need to add the global site tag to Shopify.

4. How to Add Google Analytics to Shopify?
Now, you have a Google Analytics account and Shopify Store. Let’s check out how you can connect Google Analytics to Shopify.
STEP 1: On your Google Analytics Data Stream Setup, select ‘Web’ as your preferred platform and start setup.
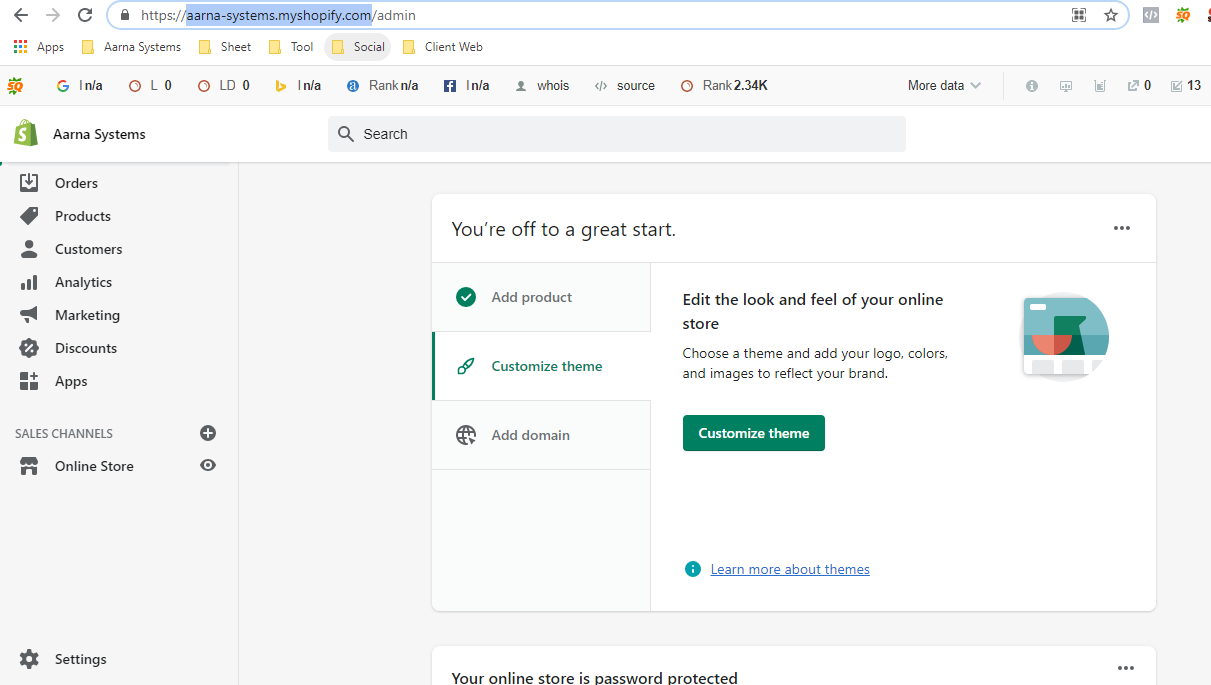
STEP 2: Now, you need to enter your website URL. In your case, it will be your Shopify store URL. Go to your Shopify store and copy the URL. The complete URL on your Shopify store is not required; just paste the URL that belongs to your store.
Select and Copy URL as shown in the image.
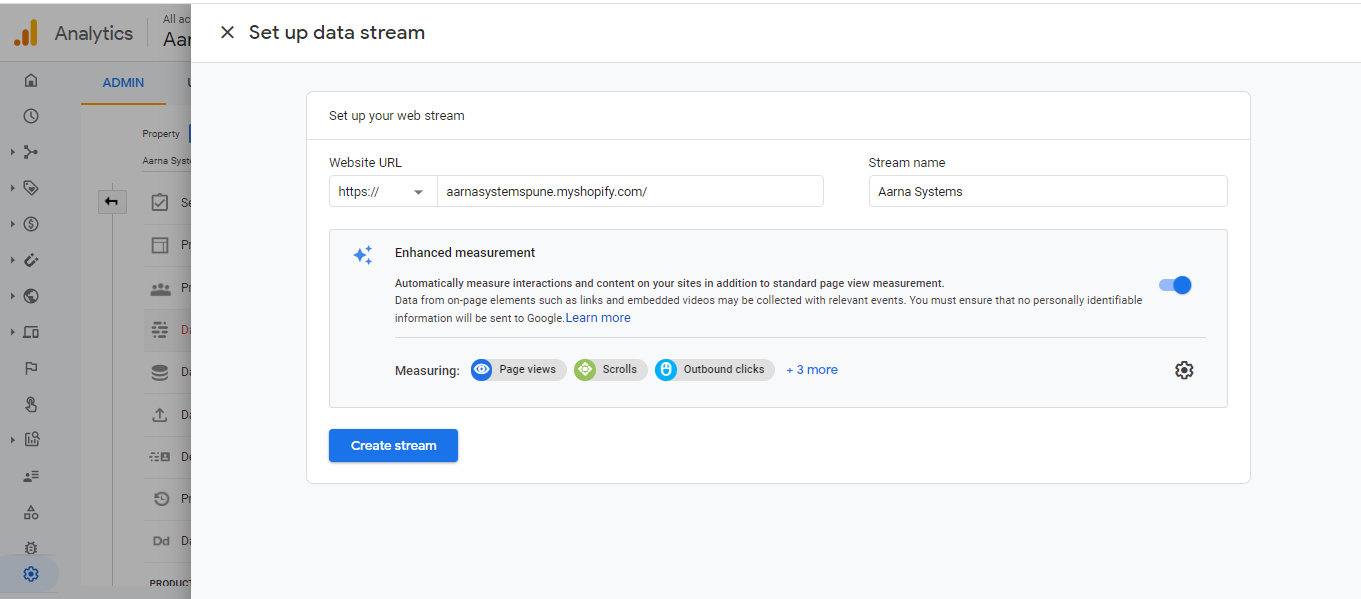
STEP 3: Now, come back to your Google Analytics tab. Paste the copied URL and enter your stream name (business name). Turn on the Enhance Measurement Button to automatically measure interactions and contents on your Shopify store. After that, click on the create stream button.
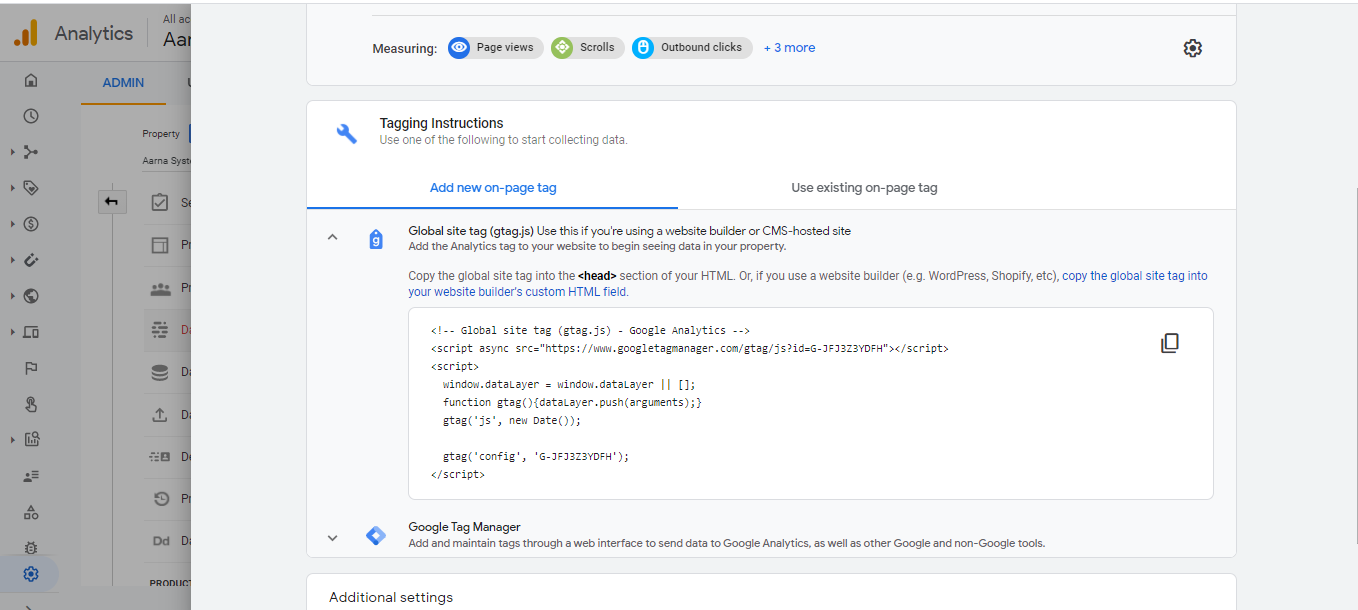
STEP 4: As you click the create stream button, it will take you to the next step, where you can see your Stream URL, Steam Name, and Measurement ID. Earlier it was effortless to link your Google Analytics to the Shopify store by simply copy-pasting the Measurement ID to the backend of a Shopify store. Relax! It’s not very complicated even now.
Simply scroll down to ‘Global site tag (gtag.js). You will see a code, click on the Copy icon to copy the complete code. Now, you need to add a tracking code to Shopify.
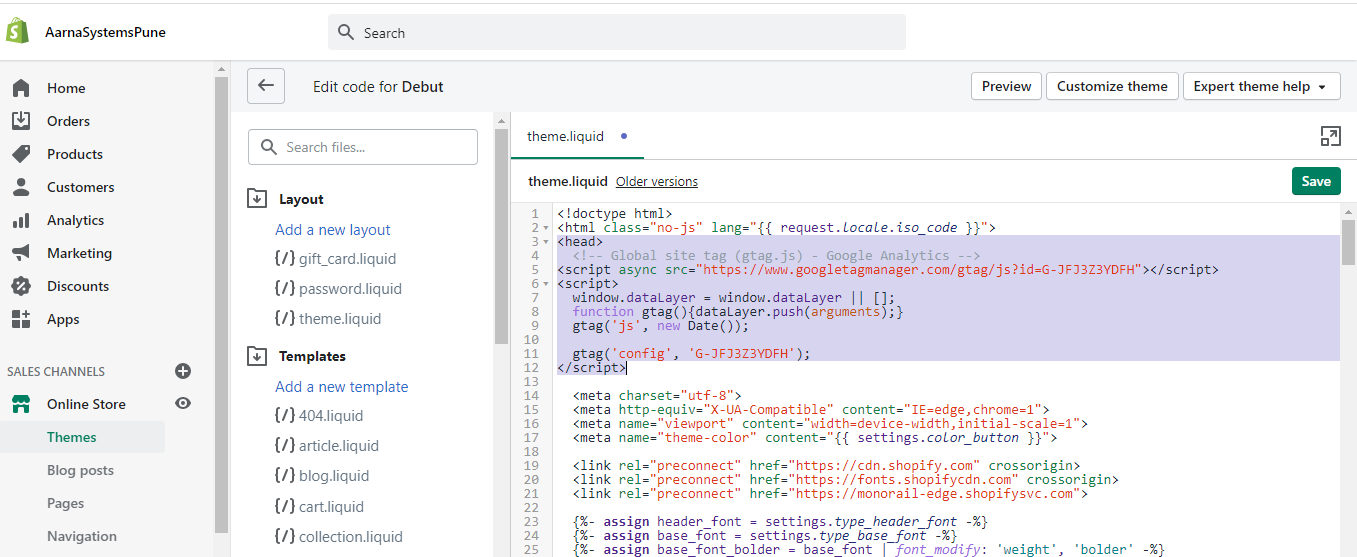
STEP 5: Go to your Shopify store. You will see an ‘Online Store’ under Sales Channels; select it > Select Themes under Online Store > Click on Actions> Select Edit Code. Under Edit Code, select Layout> {/} theme.liquid. This is where you need to paste the copied code from Google Analytics.
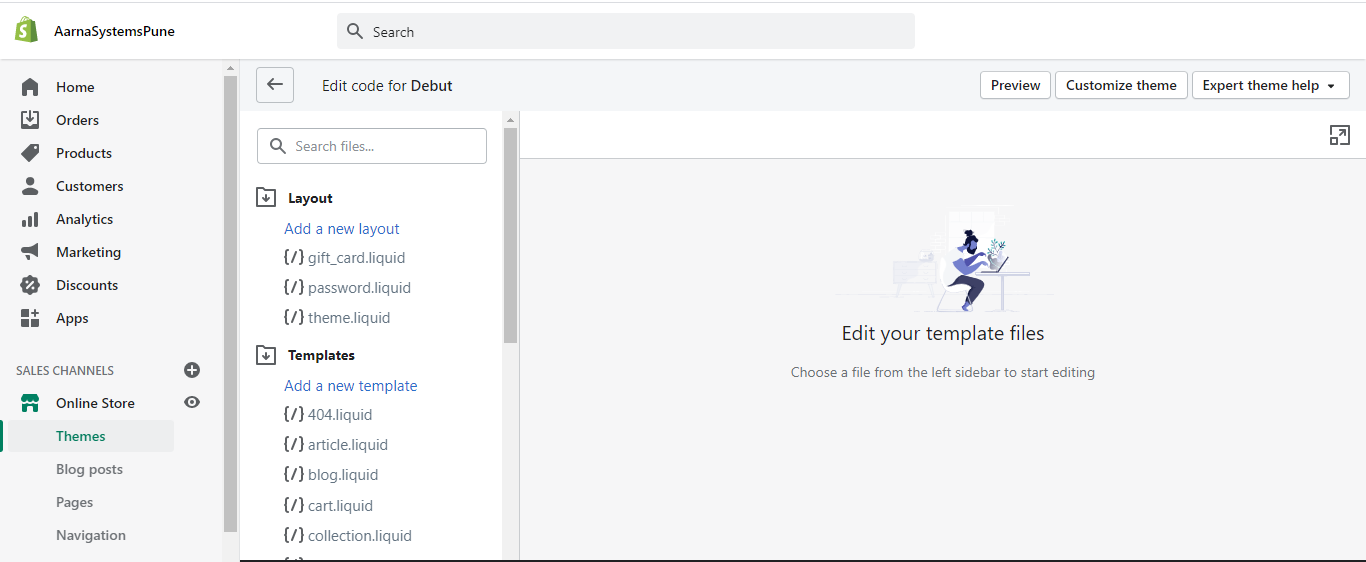
STEP 6: In {/} theme. liquid, you will see codes. Click next to the <head> tag > Press Enter and paste the copied Google Analytics code > Click Save.
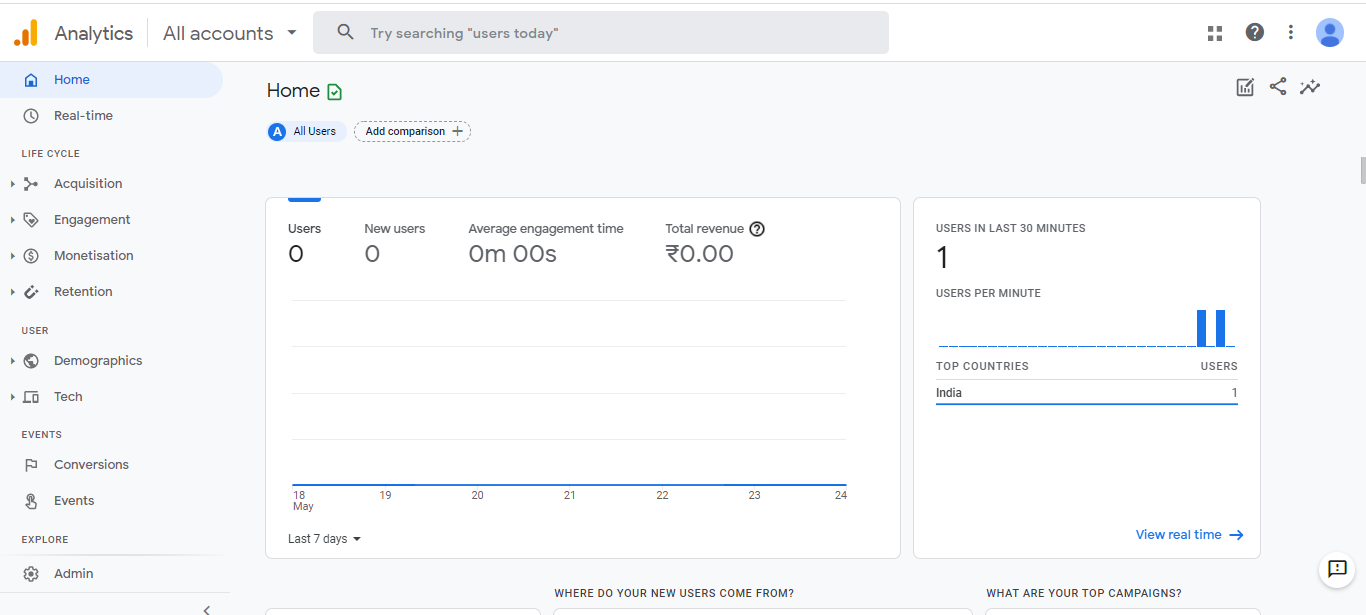
STEP 7: The code is now placed, and you have most likely done the process successfully. However, a quick check to ensure it is a must. To do this, go back to your Shopify Home Page, navigate through the store for some time. You need to do this step to send data to Google Analytics.
STEP 8: Now, head over to Google Analytics Tab. You will be back to the page from where you had copied the code. Exit out of it. Select Home > Under Accounts, select your Shopify store from properties & apps if you have multiple properties; otherwise, skip the step> You should be able to see 1 user in the last few minutes with the location. Obviously, that will be the result of the data you sent to Google Analytics by navigating your Shopify store in Step 7.
Wahoo! It’s all set. Your Shopify store is successfully linked to Google Analytics.
5. Enabling Ecommerce Tracking
Ecommerce Tracking for businesses with an e-commerce setup such as Shopify Store is like a cherry on the cake. It helps businesses to track purchase activities on the website. It can be used to track and analyse transactions, sold products, revenue, trend changes, and lots more.
So, why ignore this outstanding feature of GA 4 and Shopify. Let’s get started.
-
Enabling Ecommerce Tracking on Google Analytics
STEP 1: Log in to your Google Analytics account, click on the Admin button (placed in the bottom left corner).
![]()
STEP 2: Next, go to Admin View> View> Select the view you want to enable.
(Note: In a Google Analytics account, a ‘view’ is a subset of a property. Every view can have its view filters and configurations. Make sure you have selected the correct view. In this image, it’s 1 Master Plan)
![]()
STEP 3: In the selected view, click on Ecommerce Settings.
![]()
STEP 4: As you enter Ecommerce Settings, you will see Admin> Ecommerce Setup. Turn on the toggle to enable ecommerce tracking.
![]()
Once done, you can also enable enhanced ecommerce reporting to get additional insights and create customized labels in the checkout process. Next, hit Save.
![]()
STEP 5: Now, you need to add the ecommerce tracking code to your Shopify store/website. If you use gtag.js as your Google Analytics tag, you can measure transactions. To initiate measurement, send a purchase event with the items in the transaction. To refer to code for Ecommerce with gtag.js, CLICK HERE.
-
Enabling Ecommerce Tracking on Shopify
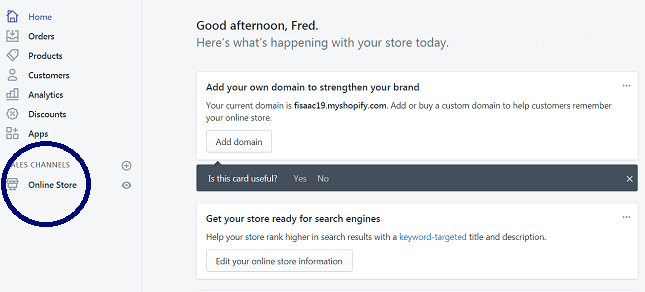
STEP 1: Log in to your Shopify Store, head over Online Stores under Sales Channels.
STEP 2: Now, Select ‘Preferences’
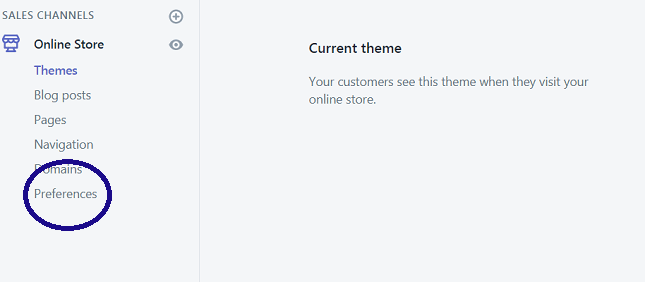
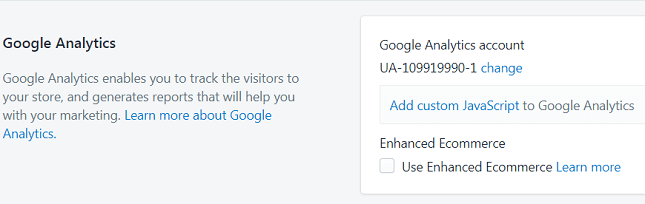
STEP 3: As you enter Preferences, you will see Google Analytics account details. Below that, there is an option named ‘Enhanced Ecommerce’; check the box to use enhanced ecommerce. Now, you will be able to send ecommerce data to your Google Analytics.
Hooray! By successfully enabling your Shopify Enhanced Ecommerce preference, you are ready to get the sales conversion data on point.
6. What’s better: Shopify Analytics or Google Analytics?
If you are planning to match your Shopify Analytics data with Shopify Google Analytics 4, beware it could get tricky. When comparing both, there is no specific way to determine which one is more accurate. It is generally said that Shopify Analytics updates faster and more accurately as they are connected to the Shopify store. However, the numbers on Google Analytics often show more visits and other data. Hence, you need to understand which is working better for your store.
Also, Shopify reports are limited to 30,000 customers. If otherwise, you are a big player on Shopify, Google Analytics is a go-to tool for you. Decide your requirement and choose your tool wisely. It is alright to use both tools as long as you understand your Shopify store customers’ buying behaviour and conversion patterns.
7. Conclusion
If you’ve followed this detailed guide and have more questions, it’s a good sign. Setting up analytics for your Shopify store is the tip of the iceberg; there’s lots more to explore. We are glad that you now know how to set up a Google Analytics account, add your Shopify Google Analytics and use the Enhanced Ecommerce feature to gather more data and flourish your online business. We recommend not jumping deep into analytics from day one. Go one feature a day to understand it better. If all this sounds too tricky, you can always hire a professional Digital Marketing Company in India that is a certified Shopify Partner to get the best results for your Shopify Store. At Aarna Systems, we have the best Ecommerce Marketing Experts India and a complete Digital Marketing Team to professionally market our Shopify clients’ business. You can trust in our performance and enjoy results that speak volumes!